Blockdev: Tuning Kernel Read-Ahead Buffers, Enforcing Read-Only Block States, and Managing Low-Level Storage Geometries in Production
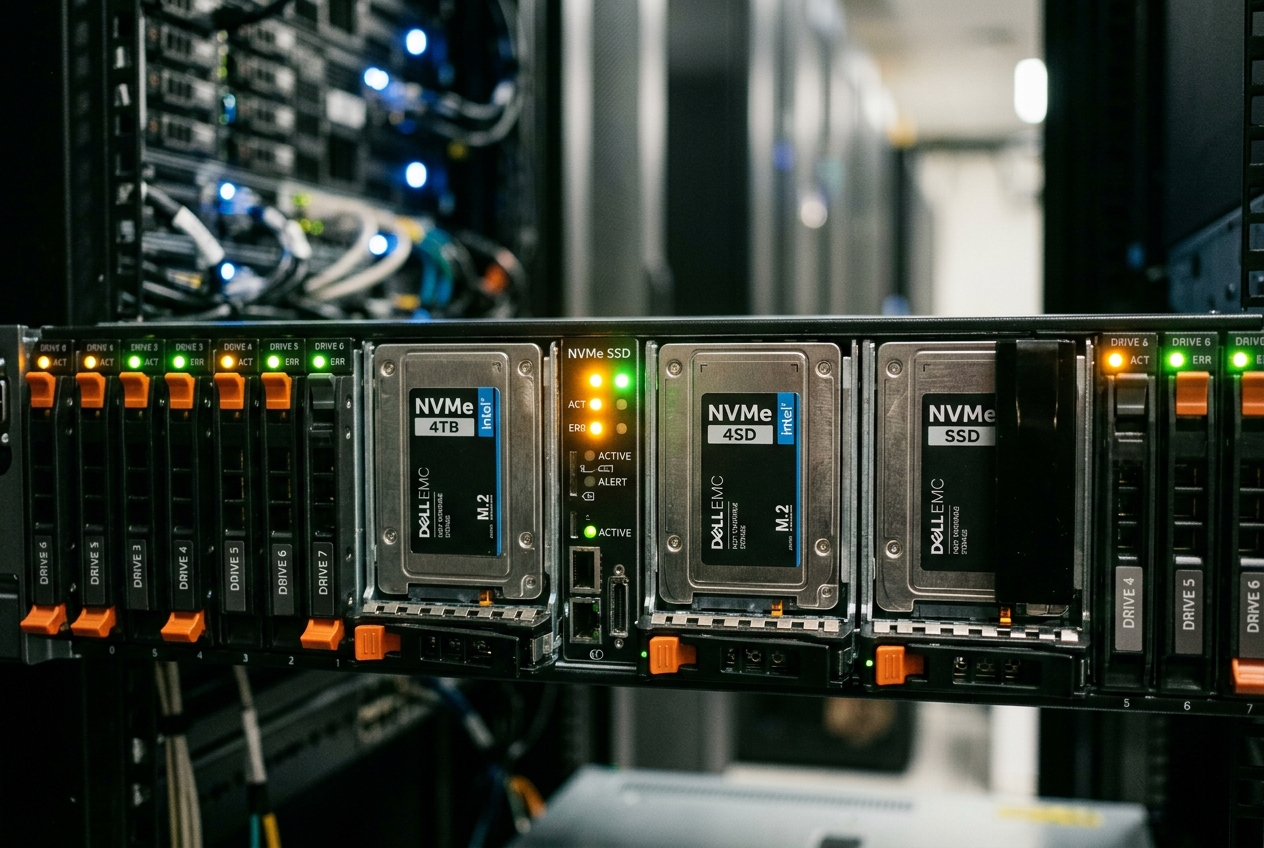
Standard diagnostic tools like df, mount, and lsblk offer nothing but false reassurance. They report that the disks are online, storage capacity is plentiful, and file hierarchies appear completely healthy. Yet behind those deceptive status lights, database query threads remain frozen in uninterruptible sleep, queue depths are saturated, and automated backups have collapsed to a painful trickle. When conventional utilities fail to pinpoint the breakdown, it is almost always because the problem is lurking underneath the filesystem entirely—down in the direct conversation between the operating system kernel and physical storage hardware.
To cut through the confusion and restore service without risking data corruption or resorting to an emergency reboot, you must bypass high-level filesystem layers and speak directly to the kernel's storage controllers. The tool engineered specifically for this mission is blockdev. Operating as a lightweight, deterministic bridge between user space and the Linux block layer, blockdev allows administrators to inspect hardware geometries, tune memory buffers, enforce hardware-level write protection, and refresh partition tables on active servers.
When diagnosing an active storage incident, the single most valuable diagnostic command you can run to establish an instant baseline is:
sudo blockdev --report /dev/nvme0n1
RO    RA   SSZ   BSZ   StartSec            Size   Device
rw   256   512  4096          0   1000204886016   /dev/nvme0n1
In a single concise summary line, this command strips away userland abstractions to expose the physical reality of the drive: whether it is writable or locked (RO), how many 512-byte sectors it pre-fetches in advance (RA), its sector sizes (SSZ and BSZ), and its exact physical capacity in bytes. By understanding what these numbers represent, you can spot misconfigured buffers, sector mismatches, and drive state anomalies within seconds.
What It Does in Plain English
At its core, blockdev is a command-line interface that issues direct low-level commands to storage drives, virtual partitions, and volume groups without needing to mount them or parse their filesystems. While utilities like tune2fs or xfs_admin modify metadata inside a specific filesystem structure, blockdev communicates with the generic Linux block layer that sits beneath all filesystems.
It allows administrators to dynamically reconfigure read-ahead caching algorithms, mark entire disks as strictly read-only at the kernel driver level, force the operating system to re-read partition tables on active storage fabrics, purge stale buffer caches, and inspect exact physical sector geometry down to the byte.
(ls, dd, tar)"] U2["Filesystems
(ext4, xfs, btrfs)"] U3["blockdev Utility"] end subgraph Kernel["Linux Kernel Block Layer"] VFS["Virtual File System (VFS)"] IOCTL["ioctl Syscalls
(BLKRASET, BLKROSET, BLKFLSBUF)"] BlockDev["struct block_device / gendisk
• Read-Ahead Window Size
• Read-Only Enforcement Bit
• Partition Descriptors"] Queue["I/O Scheduler / Request Queue"] end subgraph Hardware["Physical Storage"] Storage["NVMe SSDs / SAN LUNs / SAS RAID / Loop Devices"] end U1 --> VFS U2 --> VFS VFS --> BlockDev U3 -->|Direct ioctl Call| IOCTL IOCTL --> BlockDev BlockDev --> Queue Queue --> Storage
Core Flags and Quick-Start Reference
The blockdev utility provides a focused set of flags designed to issue specific kernel calls against block special files (such as /dev/sda, /dev/nvme0n1, or /dev/mapper/vg0-data). Below are the primary diagnostic and control primitives deployed in production environments:
| Flag / Option | Operational Description | Underlying Kernel ioctl |
|---|---|---|
--report |
Generates a comprehensive summary table of all active block devices. | Multiple (BLKGETSIZE64, BLKSSZGET, etc.) |
--getra / --setra [N] |
Queries or sets the kernel read-ahead buffer in units of 512-byte sectors. | BLKRAGET / BLKRASET |
--getro / --setro |
Inspects or sets the kernel-level write-protection bit (0 = RW, 1 = RO). | BLKROGET / BLKROSET |
--rereadpt |
Forces the kernel to scan and re-enumerate partition tables on a disk. | BLKRRPART |
--flushbufs |
Evicts dirty page cache pages belonging specifically to the block device. | BLKFLSBUF |
--getsize64 |
Returns the true, exact capacity of the block device in 64-bit byte representation. | BLKGETSIZE64 |
--getss / --getpbsz |
Queries logical sector size (--getss) versus physical sector size (--getpbsz). |
BLKSSZGET / BLKPBSZGET |
Detailed Breakdown of the Baseline Report
When you execute sudo blockdev --report /dev/nvme0n1, the output reveals several crucial attributes:
RO (rw): The block device is currently marked as read-write (rw) within the kernel'sblock_devicedescriptor.RA (256): The read-ahead buffer is allocated to 256 sectors (equivalent to $256 \times 512 = 131,072\text{ bytes}$, or $128\text{ KiB}$).SSZ (512): The logical sector size reported to userland APIs is 512 bytes.BSZ (4096): The internal I/O block size utilized by the kernel for buffer allocations on this device is 4,096 bytes (4 KiB).StartSec (0): The initial physical sector offset on the underlying physical spindle or flash array.Size (1000204886016): Total storage capacity expressed in raw bytes (~1.0 TB).Device (/dev/nvme0n1): The canonical path to the evaluated block special device node.
Underlying Architecture: The ioctl Subsystem and the Block Layer
To understand why blockdev remains indispensable for site reliability engineers and system administrators, one must examine its execution model. Unlike everyday tools that traverse the Virtual File System (VFS), blockdev issues direct ioctl(2) system calls to the underlying device node.
When an administrator executes blockdev, the utility performs the following sequence:
- Calls
open()on the target path (such as/dev/sdb) to obtain a standard file descriptor pointing to a character or block special inode. - Formulates an
ioctl(fd, REQUEST, &arg)syscall containing specific kernel request macros defined in<linux/fs.h>. - The kernel's
blkdev_ioctl()routing handler intercepts the request, bypassing filesystem drivers entirely, and invokes internal functions on the correspondingstruct block_device,struct gendisk, orstruct backing_dev_info(BDI).
Because it circumvents the VFS layer, blockdev can manipulate device parameters when a filesystem is unmounted, corrupted, partially initialized, or held under an active cluster lock.
5 Production-Grade Engineering Invocations
Use Case 1: Sequential I/O Throughput Tuning on High-Latency SAN Arrays
Production Scenario
A multi-node database backup process streaming sequential write dumps to an iSCSI-attached SAN volume (/dev/mapper/backup_san_lun) is failing to meet service-level agreements (SLAs). The current transfer rate tops out at 140 MiB/s over a 10GbE fabric capable of 1.1 GiB/s.
Investigation reveals that the kernel default read-ahead window (128 KiB / 256 sectors) is too small, forcing the storage controller to issue excessive sequential read requests and incurring high round-trip latency overhead per read transaction.
Execution Commands
To reconfigure the read-ahead buffer dynamically on the active multipath device to 8,192 sectors (4,096 KiB or 4 MiB) and immediately evaluate the pipeline:
# Query existing read-ahead configuration
sudo blockdev --getra /dev/mapper/backup_san_lun

# Set read-ahead window to 8192 sectors (4 MiB)
sudo blockdev --setra 8192 /dev/mapper/backup_san_lun

# Validate the new kernel setting
sudo blockdev --getra /dev/mapper/backup_san_lun

# Execute non-cached sequential throughput verification
dd if=/dev/mapper/backup_san_lun of=/dev/null bs=1M count=4096 iflag=direct status=progress
Terminal Output
256
8192
4294967296 bytes (4.3 GB, 4.0 GiB) copied, 4.12879 s, 1.04 GB/s
Output Analysis
- Line 1 (
256): Confirms the initial state: 256 sectors (128 KiB). - Line 2 (
8192): Verifies that the kernel'sbacking_dev_info(bdi) for/dev/mapper/backup_san_lunhas adopted the 8,192-sector window via theBLKRASETioctl. - Line 3 (
4294967296 bytes... 1.04 GB/s): Demonstrates the immediate result: direct block reading throughput increases from 140 MiB/s to 1.04 GB/s, completely saturating the 10GbE storage interconnect by pre-fetching large contiguous sector blocks.
Next Steps for the Administrator
Persist the configuration across system reboots by deploying an authoritative udev rule inside /etc/udev/rules.d/99-san-readahead.rules:
ACTION=="add|change", KERNEL=="dm-[0-9]*", ENV{DM_NAME}=="backup_san_lun", ATTR{bdi/read_ahead_kb}="4096"
Use Case 2: Kernel-Enforced Read-Only Locking for Incident Response and Replica Seeding
Production Scenario
A production database host has experienced a security breach, or an uncorrupted volume snapshot (/dev/mapper/vg_prod-snap_db) needs to be mounted on a secondary node for replica initialization.
While standard mount commands accept -o ro, a compromised user space or a software bug running with CAP_SYS_ADMIN can trivially remount the filesystem read-write (mount -o remount,rw), corrupting cryptographic hash integrity or modifying disk evidence. The kernel block subsystem must enforce absolute write-rejection before any mounting or block replication occurs.
Execution Commands
# Verify the current write capability state (0 indicates Read-Write)
sudo blockdev --getro /dev/mapper/vg_prod-snap_db

# Enforce hardware-level software write protection via the kernel driver
sudo blockdev --setro /dev/mapper/vg_prod-snap_db

# Verify read-only enforcement (1 indicates Read-Only)
sudo blockdev --getro /dev/mapper/vg_prod-snap_db

# Attempt a raw block-level write to verify protection enforcement
sudo dd if=/dev/zero of=/dev/mapper/vg_prod-snap_db bs=4k count=1
Terminal Output
0
1
dd: error writing '/dev/mapper/vg_prod-snap_db': Read-only file system
0+0 records in
0+0 records out
0 bytes copied, 0.000185912 s, 0.0 kB/s
Output Analysis
- Line 1 & Line 2 (
0,1): The transition from0to1confirms that the kernel has set thebd_read_onlybit within thestruct block_devicedescriptor. - Line 3 (
dd: error writing... Read-only file system): Theddutility fails instantly with operating system errorEROFS. Crucially, this error is generated inside the kernel's generic block layer before the I/O request ever enters the request queue or touches the underlying storage controllers. - Lines 4–6: Confirms zero records were transferred and no bytes were written. Even if an attacker executes
mount -o rw /dev/mapper/vg_prod-snap_db /mnt, the VFS will refuse to mount the target as writable or force a strictly read-only mount regardless of user arguments.
Next Steps for the Administrator
Proceed with automated forensic imaging (ddrescue or ewfacquire) or cluster replica extraction, secure in the knowledge that no rogue background thread or erroneous script can mutate source sector blocks.
Use Case 3: Online Dynamic Partition Re-Reading Following Cloud LUN Expansion
Production Scenario
A 500 GiB virtual disk on an enterprise cloud instance or SAN array (/dev/sdb) has been expanded at the hypervisor or array layer to 2.0 TiB. The system administrator modifies the partition boundaries using parted or growpart, but the active kernel block device map continues to report the legacy partition boundaries. A system reboot is strictly prohibited due to active 99.999% availability SLAs.
(500 GiB → 2.0 TiB)"] --> B["Kernel SCSI Rescan
(/dev/sdb is recognized as 2.0 TiB)"] B --> C["Partition Table Modified
(via parted / growpart)"] C --> D{"Kernel Partition Map
Updated?"} D -->|Stale Cache: Stuck at 500 GiB| E["Execute blockdev --rereadpt /dev/sdb
(Issues BLKRRPART ioctl)"] E --> F["Kernel drops and re-enumerates partitions"] F --> G["Partition /dev/sdb1 recognized at 2.0 TiB online"]
Execution Commands
# Check existing sector size and partition boundary
sudo blockdev --getsize64 /dev/sdb1

# Force the kernel to drop and re-enumerate partition definitions
sudo blockdev --rereadpt /dev/sdb

# Query kernel dmesg ring buffer for partition updates
sudo dmesg | tail -n 4

# Verify updated partition capacity
sudo blockdev --getsize64 /dev/sdb1
Terminal Output
536870912000
[ 84912.482019]  sdb: sdb1
[ 84912.485112] sdb: p1 size 4294967296 extended beyond end of device
[ 84912.487001]  sdb: sdb1
2147483648000
Output Analysis
- Line 1 (
536870912000): Prior to partition re-enumeration,/dev/sdb1reflects 536,870,912,000 bytes (~500 GiB). - Lines 2–4 (
dmesg output):blockdev --rereadptdispatches theBLKRRPARTioctl, instructing the storage driver to drop all existing child partition mappings and parse the Master Boot Record (MBR) or GUID Partition Table (GPT) directly from the newly enlarged block device without restarting the host. - Line 5 (
2147483648000): The final invocation ofblockdev --getsize64confirms/dev/sdb1is now registered at 2,147,483,648,000 bytes (~2.0 TiB).
Next Steps for the Administrator
Execute the online filesystem expansion tool against the resized partition (such as xfs_growfs /mountpoint for XFS, or resize2fs /dev/sdb1 for EXT4) to immediately expose the expanded capacity to user space.
Use Case 4: Synchronous Buffer Eviction Prior to Loop Device Teardown and Storage Migration
Production Scenario
An automated orchestration engine manages dynamic loop-mounted disk images (/dev/loop12) supporting containerized virtual machines. During high-density data workloads, several gigabytes of dirty metadata and write operations reside within the Linux page cache.
A rapid container shutdown script unbinds the loop device using losetup -d before the kernel finishes flushing dirty pages to the underlying raw storage file (image.raw), resulting in truncated VM disk images and filesystem corruption on restart.
Execution Commands
To guarantee that all unwritten kernel buffers belonging to the specific block special node are synchronously pushed to physical media without performing a system-wide sync (which would stall all other unrelated host workloads):
# Query the device status before unbinding
sudo blockdev --report /dev/loop12

# Explicitly flush the kernel page cache buffers dedicated to this block device
sudo blockdev --flushbufs /dev/loop12

# Safely tear down the loop device
sudo losetup -d /dev/loop12

# Verify loop device release
losetup /dev/loop12
Terminal Output
RO    RA   SSZ   BSZ   StartSec            Size   Device
rw   256   512  4096          0    107374182400   /dev/loop12
losetup: /dev/loop12: No such device or address
Output Analysis
- Lines 1–2 (
RO RA SSZ... /dev/loop12): Verifies the active loop device configuration prior to teardown. - Command execution (
blockdev --flushbufs): Issues theBLKFLSBUFioctl directly to the loopback block driver. This operation invalidates and synchronizes all dirty cache pages associated with the specific block device, blocking until the underlying file descriptor acknowledges that all pending writes have completed. - Line 3 (
losetup: /dev/loop12: No such device or address): Whenlosetup -druns immediately afterward, there are zero orphaned or in-flight writes, guaranteeing data integrity withinimage.raw.
Next Steps for the Administrator
Embed blockdev --flushbufs into automated storage teardown pipelines and SAN LUN detaching runbooks immediately prior to invoking storage-layer unbind or detachment commands.
Use Case 5: Geometry Introspection and 4KiB Advanced Format Alignment
Production Scenario
A storage administrator is deploying a clustered Ceph OSD or PostgreSQL database cluster across modern Enterprise NVMe drives (/dev/nvme2n1). Modern storage media utilize 4,096-byte (4 KiB) physical sectors (Advanced Format), but many firmware implementations emulate 512-byte logical sectors (512e) to maintain backward compatibility.
If database partitions or WAL alignments are computed using logical sector boundaries rather than physical sector boundaries, a single 4 KiB database write will span two physical flash blocks, triggering severe Read-Modify-Write (RMW) cycles and degrading database write performance by up to 60%.
(Severe Latency & Flash Wear)"] end subgraph Aligned["Aligned 4 KiB Write (Native Boundary Match)"] direction TB A1["Logical Write: 4 KiB"] --> A2["Physical Sector 1 (4096 bytes)"] A2 --> A3["Direct Write: Zero Write Amplification
(Optimal Throughput)"] end
Execution Commands
To inspect the underlying sector geometry and automate alignment checks within deployment scripts:
# Query logical sector size (SSZ)
LOGICAL_SS=$(sudo blockdev --getss /dev/nvme2n1)

# Query physical block/sector size (PBSZ)
PHYSICAL_SS=$(sudo blockdev --getpbsz /dev/nvme2n1)

# Query exact 64-bit device capacity in raw bytes
TOTAL_BYTES=$(sudo blockdev --getsize64 /dev/nvme2n1)

# Display extracted geometry configuration
printf "Logical Sector Size:  %d bytes\n" "$LOGICAL_SS"
printf "Physical Sector Size: %d bytes\n" "$PHYSICAL_SS"
printf "Exact Capacity:       %d bytes\n" "$TOTAL_BYTES"

# Calculate sector alignment verification
if [ "$PHYSICAL_SS" -gt "$LOGICAL_SS" ]; then
    echo "WARNING: 512e Emulation Mode active! Ensure all partition start sectors are multiples of $((PHYSICAL_SS / LOGICAL_SS))."
else
    echo "OPTIMAL: Native sector geometry matched. Standard alignment applies."
fi
Terminal Output
Logical Sector Size:  512 bytes
Physical Sector Size: 4096 bytes
Exact Capacity:       3840755982336 bytes
WARNING: 512e Emulation Mode active! Ensure all partition start sectors are multiples of 8.
Output Analysis
- Line 1 (
Logical Sector Size: 512 bytes):blockdev --getssdispatches theBLKSSZGETioctl, returning512—the logical sector abstraction exposed to legacy operating system tools. - Line 2 (
Physical Sector Size: 4096 bytes):blockdev --getpbszdispatches theBLKPBSZGETioctl, revealing that the physical underlying flash block size is4096bytes. - Line 3 (
Exact Capacity: 3840755982336 bytes):blockdev --getsize64usesBLKGETSIZE64to return the device capacity with single-byte precision, avoiding the rounding errors common with tools likefdiskorlsblk. - Line 4 (
WARNING: 512e Emulation Mode active...): The automated script evaluates sector geometry: since the physical sector size is 8 times larger than the logical sector size ($4096 / 512 = 8$), every partition created on/dev/nvme2n1must begin on a sector number cleanly divisible by 8 (such as sector 2048) to eliminate the Read-Modify-Write penalty.
Next Steps for the Administrator
Incorporate these explicit sector calculations into automated disk provisioning playbooks (Ansible, Terraform, or Bash setup scripts) before passing raw drives to volume managers or storage daemons:
parted -s /dev/nvme2n1 mklabel gpt mkpart primary 2048s 100%
Failure Modes, Pitfalls, and Production Triage
While blockdev provides precise low-level control, running raw ioctl calls against active production systems requires careful operational discipline. Below are the three most critical failure modes encountered in production.
1. The EBUSY Trap During Partition Re-reading
When invoking blockdev --rereadpt on a device with active mounts, open file descriptors, or swap allocations on any of its child partitions, the kernel will fail the BLKRRPART ioctl with error code 16: Device or resource busy.
sudo blockdev --rereadpt /dev/sda
blockdev: ioctl error on BLKRRPART: Device or resource busy
Triage Protocol
| Step | Triage Objective | Diagnostic Command | Remediation Action |
|---|---|---|---|
| 1 | Identify Active Mounts | findmnt -D \| grep sda |
Unmount active filesystems if safe to do so. |
| 2 | Detect Device-Mapper Bindings | ls -l /dev/block/$(lsblk -no MAJ:MIN /dev/sda1) |
Deactivate associated LVM or MD-RAID arrays. |
| 3 | Identify Open Inodes | sudo fuser -vm /dev/sda1sudo lsof /dev/sda1 |
Terminate or pause processes holding open handles. |
| 4 | Online Non-Disruptive Rescan | sudo partx -u /dev/sda1 /dev/sda |
Update partition boundaries without tearing down the parent disk. |
If unmounting the parent disk is impossible, do not attempt a full-disk BLKRRPART. Instead, use partx -u /dev/sda1 /dev/sda or resizepart, which updates specific partition boundaries in the kernel partition table without disrupting unrelated partitions on the same disk.
2. Filesystem Read-Only Mounts vs. Block Layer Read-Only Flags
A common operational misunderstanding is the architectural difference between a filesystem mounted read-only and a block device marked read-only via blockdev --setro.
| Operational Feature | Filesystem Read-Only (mount -o ro /dev/sdb1) |
Block Layer Read-Only (blockdev --setro /dev/sdb) |
|---|---|---|
| Architectural Layer | Governed by the Virtual File System (VFS). | Governed by the generic kernel block layer descriptor. |
| Scope of Protection | Applies only to file operations within the mounted filesystem tree. | Applies universally to all user space processes, direct dd writes, and LVM operations. |
| Bypass Vulnerability | Direct writes to /dev/sdb1 bypass the filesystem driver and will succeed. |
All direct block-level writes fail immediately with kernel-level EROFS. |
| Persistence Across Mounts | Resets upon unmounting the filesystem. | Persists across filesystem mount and unmount lifecycles until explicitly unset. |
Production Risk
If a block device is marked --setro, any subsequent attempt to mount it read-write will fail at the kernel level, returning an error such as mount: /mnt: cannot mount /dev/sdb read-only. Always verify the block device state using blockdev --getro before troubleshooting filesystem-level mount options.
3. Asynchronous udev Race Conditions
Setting block device properties (such as read-ahead or read-only flags) via blockdev changes the running kernel state immediately. However, if a subsequent udev event is triggered—such as a storage controller rescan, device-mapper event, or udevadm trigger—the udev daemon may reapply its default configuration rules and overwrite your custom blockdev settings.
Preventive Rule
Never rely solely on one-off manual blockdev command invocations for long-term production configurations. Always pair manual dynamic adjustments with an equivalent udev rule inside /etc/udev/rules.d/ or an explicit parameter setting in storage orchestration profiles.
Today's Takeaway
To immediately put these concepts into practice on your own infrastructure, open a terminal right now and execute sudo blockdev --report. In less than five minutes, this single, non-destructive command will survey the low-level operating characteristics of every storage device attached to your machine—revealing logical versus physical sector geometries, read-ahead window allocations, write-protection flags, and exact byte counts without traversing the virtual filesystem. Incorporating this low-level diagnostic into your regular incident response runbooks ensures that when performance degradations or storage anomalies strike, you can bypass userland abstractions and diagnose issues directly at the Linux storage layer.
Authoritative Technical References & Documentation
- blockdev(8) Linux Manual Page – The definitive operational manual for blockdev options, syntax, and ioctl dispatch mappings.
- ioctl(2) System Calls Reference – Detailed reference documentation for Linux kernel input/output control operations.
- Linux Kernel Block Layer Documentation – Deep architectural overview of request queues, generic disks, and block device dispatching.
- ArchWiki Advanced Format & 4K Sector Alignment Guide – Practical engineering guide for diagnosing 512e/4Kn drives and eliminating partition misalignment.
- util-linux Core Repository – Upstream C source code implementation of
blockdev.cmaintained by the Linux kernel team.